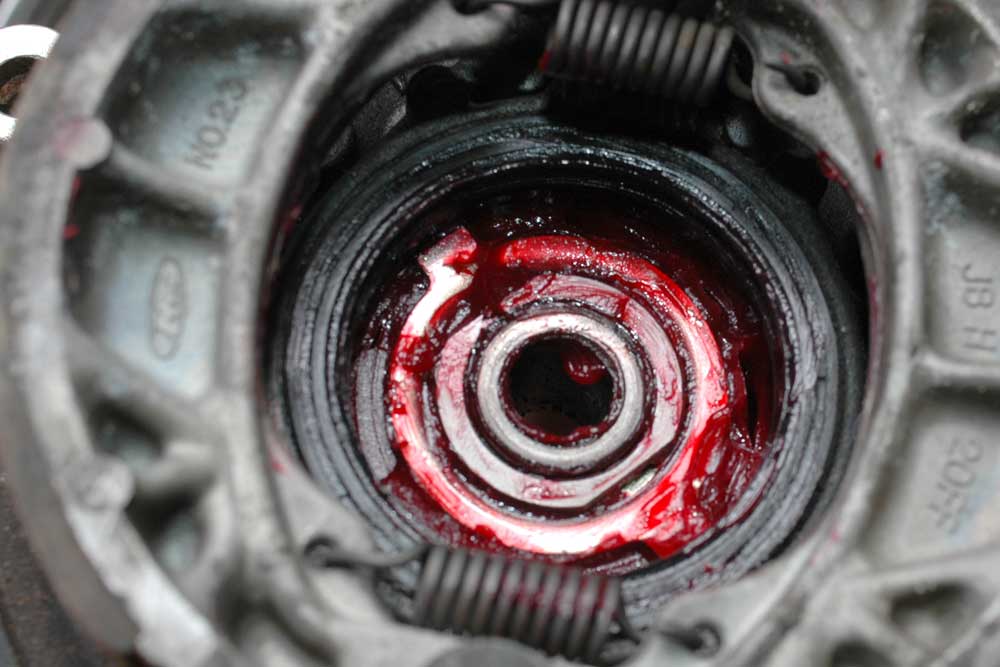
The speedo drive (light coloured metal) inside the front brake. Note the black seal which stops speedo drive grease getting into the brake linings of the hub.
The Wenga Postie Bike Project -> The rebuild -> Brakes
Postie bikes don't work their brakes that hard, so its not surprising that a few of the drums in the parts purchased had plenty of meat. Only a couple of them were black, which is the colour of the front hub, so I picked the best one and went from there.
The speedo drive for a postie bike is inside the front brake drum. It is a little helical gear, mounted on a little wing-shaped thing, with the tongues off this wing-shaped thing keeping the gear stationary as the drum rotates. This turns a worm-drive gear which in turn rotates the tongue which then turns the speedo cable. Sounds complex, but is really simple. You just use some pliers and lift the speedo drive out, give it a good regreasing, and put it back in.
The speedo drive (light coloured metal) inside the front brake. Note the black seal which stops speedo drive grease getting into the brake linings of the hub.
20 year old grease is very skanky, but now the speedo drive works beautifully (was really stiff before). I used some nice high-quality high-temperature wheel bearing grease for this. Overkill, but oh well. Apart from that, it's just a case of cleaning up the face of the brake, removing any grease that has seeped past the seal, and giving the brakes a rough-up with a bit of 120 grit sandpaper (whilst not breathing the asbestos in from the shoes or the linings). Once that's done, the brake can be pushed onto the wheel to make sure that the speedo drive works, and polished up a bit so it looks newer.
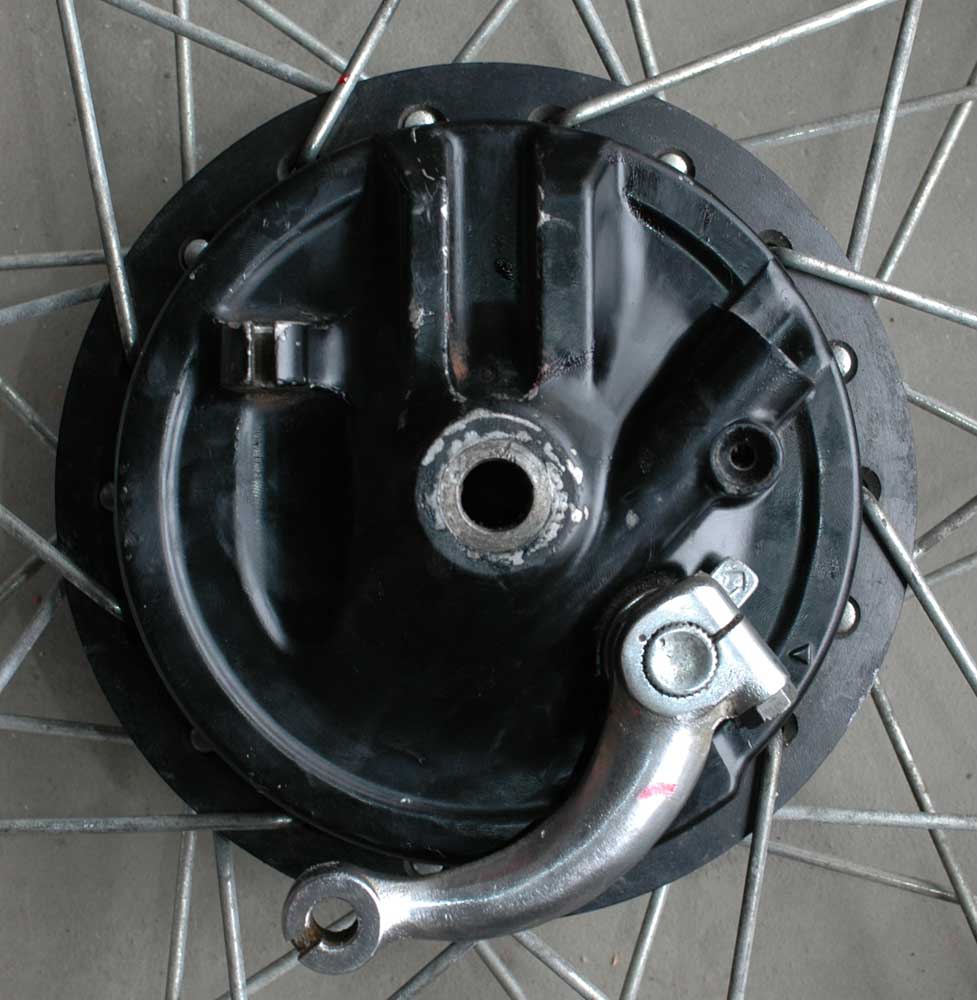
Front brake installed in the front wheel.
Whilst we're here, probably worthy to note I made a bit of a hybrid brake. The brake acutating levers on the black (modern) brakes look pretty crap. The old-style brakes use a cooler lever, so I polished up an old lever and put it on. Naturally, I made sure that the little wear-marker arrows still worked.
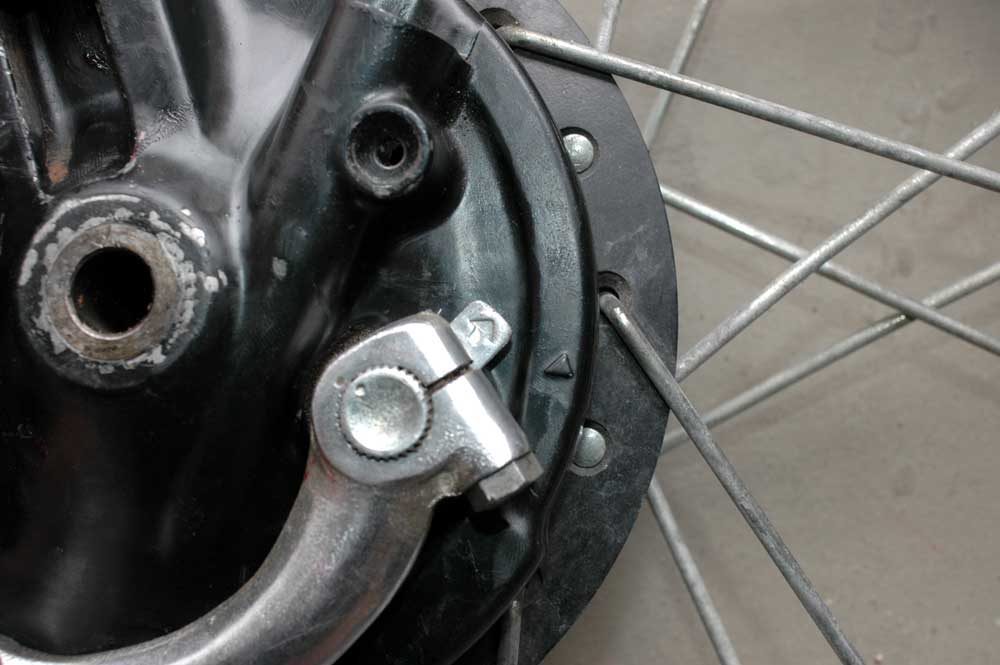
Front brake lever and the wear marker arrows.
Note the silver tab with the arrow, and the arrow on the brake drum. When the brake is pulled on (as it is here) and the brakes are worn out, these two arrows point at each other. As you can see, this brake still has plenty of life left in it. The wear-marker arrow is actually mounted on a tab which is indepedant of the actuating lever. In fact, you can move where the lever is mounted, so long as it lines up on the splines on the actuating rod, but the wear marker has a little tab so it can only be mounted one particular way.